Creating a dashboard with NagiosTV and Livestatus on Ubuntu 20.04
Hey all. I was tasked with setting up a new NagiosXI instance and we needed a dashboard for the office. I found one, NagiosTV, which is super clean and easy to use. The only problem I ran into was creating a dashboard that was able to be accessed without credentials. I ended up using MK Livestatus to fetch the data to display on our big screen.
I'll show you how to do this here, just because it took a bit to get it figured out.
My selected distro is Ubuntu 20.04 LTS.
All configurations are done as root, so
sudo su
NagiosTV Installation
NagiosTV Created and maintained by chriscareycode on github.
The github repository has an install guide. I'll also post mine here just to keep everything together. It's pretty easy.
wget https://github.com/chriscareycode/nagiostv-react/releases/download/v0.8.4/nagiostv-0.8.4.tar.gz
tar -xvzf nagiostv-0.7.1.tar.gz
sudo mv nagiostv /usr/local/nagiosxi/html/nagiostv
sudo chown -R nagios /usr/local/nagiosxi/html/nagiostv
sudo chgrp -R nagios /usr/local/nagiosxi/html/nagiostv
Now you should be able to navigate to the nagiostv page: http://servername/nagiosxi/nagiostv
Livestatus Installation
Livestatus now resides with CheckMK, I'll post the specific download link.
CheckMK
Note: I don't believe they are releasing any more versions of Livestatus. The last version I see is 1.5.0p25. Newer releases only offer Checkmk with OMD.
Let's begin by making sure we download the needed utilities
sudo apt install rrdtool librrd-dev librrd8 libboost-dev libboost-system-dev
First you'll need to download the tar file from above and extract it.
 cd /tmp
 wget https://download.checkmk.com/checkmk/1.5.0p25/mk-livestatus-1.5.0p25.tar.gz
 tar -xzvf mk-livestatus-1.5.0p25.tar.gz
 cd mk-livestatus-1.5.0p25
Next we'll configure, make, and install mk-livestatus. Be sure to use the --with-nagios4 flag for proper compilation and installation.
 ./configure --with-nagios4
 make
 sudo make install
Let's add a line in nagios.cfg to allow livesocket to receive updates from nagios.
vi /usr/local/nagios/etc/nagios.cfg
Add the line
broker_module=/usr/local/lib/mk-livestatus/livestatus.o /usr/local/nagiosxi/var/subsys/livestatus
You should see another broker_module line while you're in there. Just add the above line after that one.
Restart the Nagios service so the socket shows up under /usr/local/nagiosxi/var/subsys
Restart the Nagios Service
systemctl restart nagios.service
Now we should be able to test and see if we get output.
Will probably need to run this as sudo to get output.
echo "GET status" | /usr/local/bin/unixcat /usr/local/nagiosxi/var/subsys/livestatus
Note: /usr/local/nagiosxi/var/subsys/livestatus is where livesocket opens the socket. If we weren't using xi, the path could reflect "/usr/local/nagios/var/subsys" for example.
Lastly, let's point NagiosTV to where it should look for that livesocket instance.
Under /usr/local/nagiosxi/html/nagiostv/connectors there are two files: livestatus-settings.php and livestatus-settings.ini.sample
The file ending in .sample is obviously a sample, so we can leave that alone for a backup. Let's change this line in livestatus-settings.ini
sudo cp livestatus-settings.ini.sample livestatus-settings.ini
sudo vi livestatus-settings.ini
[livestatus]
socket_path = /usr/local/nagios/var/rw/live.sock
to
[livestatus]
socket_path = /usr/local/nagiosxi/var/subsys/livestatus
One more service restart
$ systemctl restart nagios.service
And that's all from that side. Now let's navigate to the NagiosTV url. We'll need to change some settings.
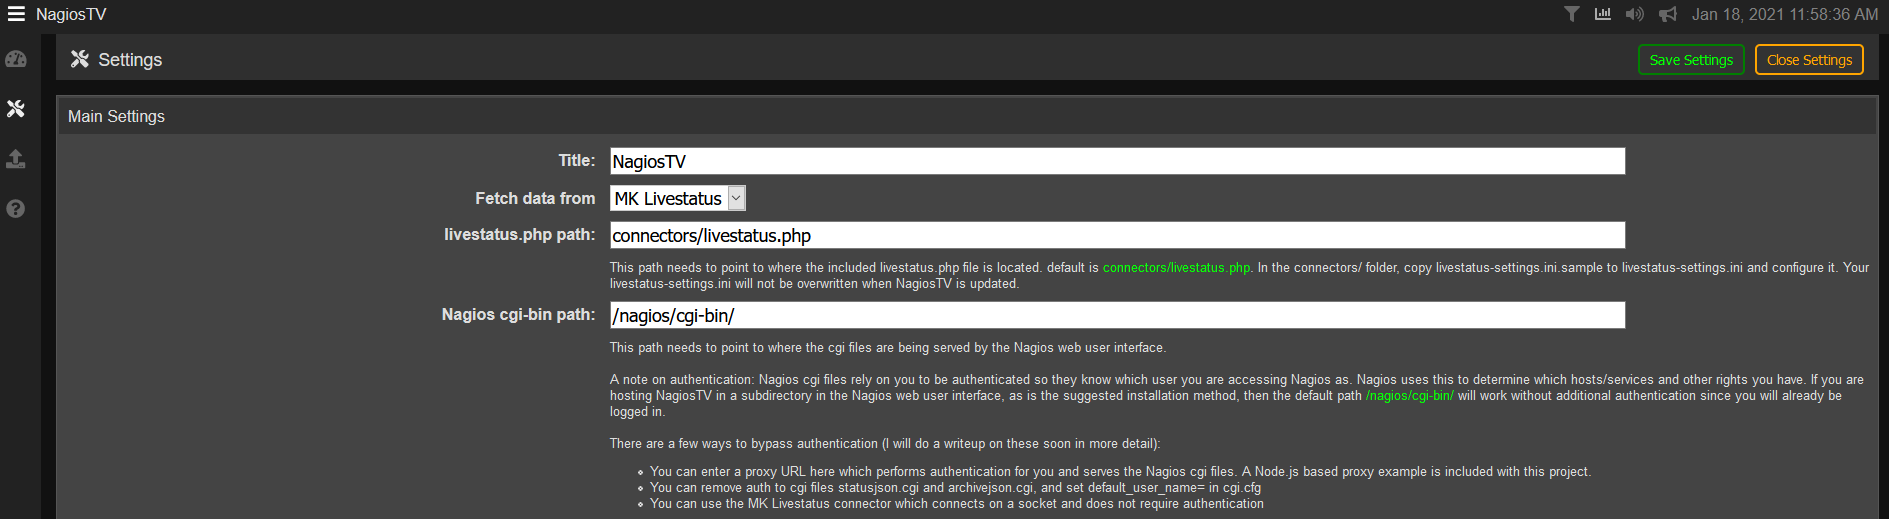
The above screenshot reflects how I have mine set up. You'll want to make sure that "Fetch data from" is MK Livestatus.
All of the other settings should be fine.
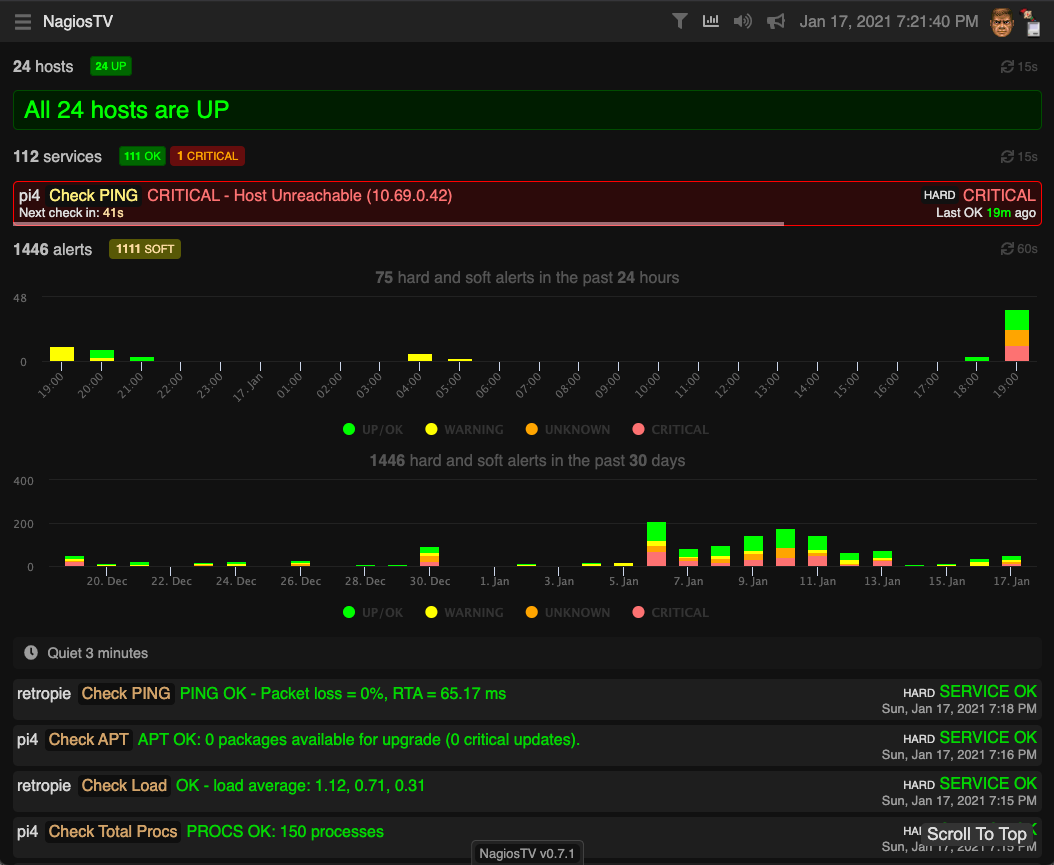
There we have it! NagiosTV should open without prompting for any credentials! This is going to work great on the large screen TV in the office.
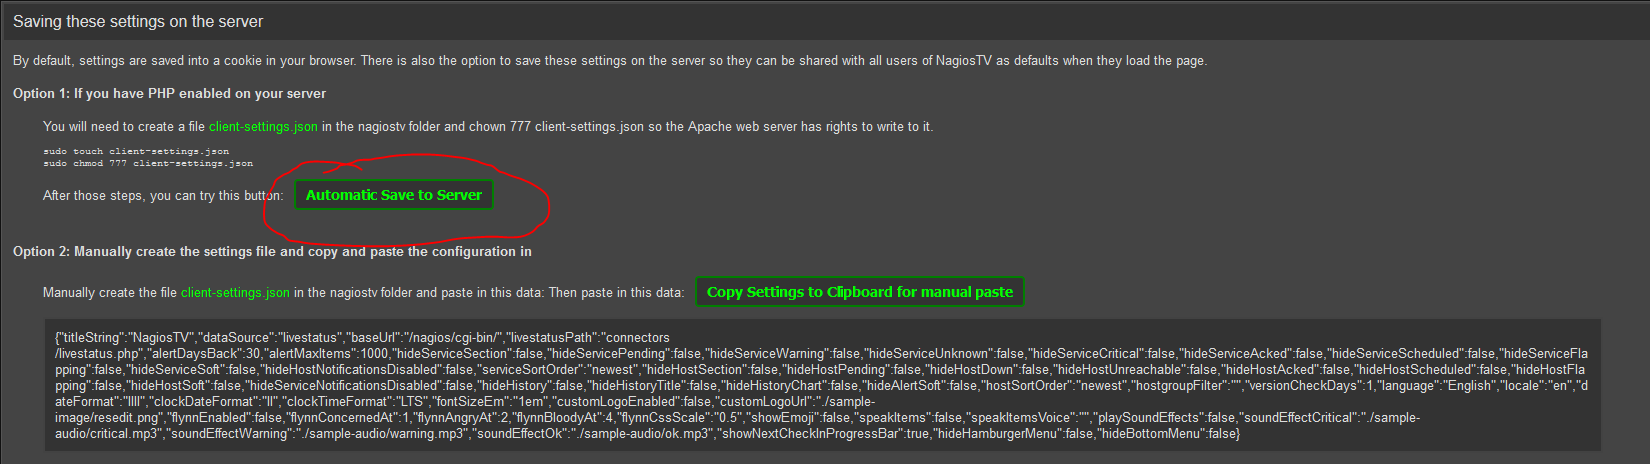
One more thing. It's a good idea to save your settings so that anyone who accesses NagiosTV has the same settings as you configure. Good for situations where multiple people may access the dashboard individually. Below is a screenshot, just follow the instructions listed on the page.
Happy Monitoring!


Comments ()